A 20 mm drawing dimension does not tell you which rod to order: the opening may be narrower at one point, wider at another, or partly blocked by old sealant. You will be able to measure the installed joint, apply a 25–50% oversize rule, select a practical polyethylene foam diameter, and set the rod to leave the correct sealant depth.
Key takeaways
- Measure joint width at several points, including the narrowest usable section.
- Choose a rod 25–50% larger than the measured joint width.
- Set sealant depth with the rod, not by forcing sealant into the full joint.
- Compare density, cell structure, compatibility, and test documents before ordering.
Measure the opening at its narrowest usable point
Measure the joint at its narrowest usable point before choosing a backup rod size for building joints in Delhi. Use a steel rule, vernier caliper, or joint-width gauge at the top, middle, and bottom, then repeat at several points along the façade, slab, window perimeter, or precast-panel run.
Record both the narrowest and widest readings; do not trust the nominal drawing width.
| Tool | Best use | Measurement check |
|---|---|---|
| Steel rule | Accessible, regular joints | Read the clear opening without crossing old sealant |
| Vernier caliper | Narrow or uneven joints | Take several readings without crushing the edges |
| Joint-width gauge | Repeated site checks | Compare the gauge with the cleanest usable recess |
Remove loose debris, dust, laitance, standing water, and old sealant before measuring. Do not measure across an existing sealant bead. If the joint is partly filled, cut out enough material to expose the intended depth, then clean and dry both sides. Note installation temperature because thermal movement changes the opening.
For a tapered joint, size the rod to the narrowest section it must pass through. A loose rod can shift during gunning and allow bottom contact; an oversized rod can damage weak concrete or masonry edges.
- Irregular: measure several locations and use the tightest clear opening.
- Damp: dry the recess and confirm the sealant system permits polyethylene foam.
- Tapered: check the smallest passage, not the surface width.
- Contaminated: remove dust, laitance, water, and old sealant before recording readings.
Use the 25–50% oversize rule with a size chart
Start with a rod 25–50% larger than the measured joint opening. This compression keeps the polyethylene foam backup rod in contact with both sides during sealant installation; the rod manufacturer’s compression guidance controls the final choice.
“Choose backer rod size in Delhi” is not a climate-zone lookup: joint width, movement, sealant geometry, and installation temperature determine the diameter.
| Opening | Starting rod diameter |
|---|---|
| 6 mm | 8 mm, where available |
| 10 mm | 13 mm |
| 15 mm | 19 mm |
| 20 mm | 25 mm |
| 25 mm | 32 mm |
| 30 mm | 38 mm |
These are approximate nominal diameters, not guaranteed finished measurements. Supplier tolerances can change the fit, so check the stated diameter range before ordering polyethylene foam backup rod sizes. For a 6 mm joint, consider a 10 mm rod only after checking available sealant depth, joint-edge strength, and the manufacturer’s permitted compression.
Do not substitute it automatically because it exceeds the usual starting range.
Excessive compression makes installation difficult and can increase stress in the sealant. Insufficient compression lets the rod fall out or shift, leaving an unreliable bond breaker and risking sealant failure. For any joint wider than 30 mm, recheck the movement design instead of simply choosing the next larger rod.
A wider opening may require a different joint detail, sealant depth, or filler system.
Set the rod to produce the specified sealant geometry
For a 10 mm joint, set the rod so about 5 mm of sealant remains above it; use about 10 mm for a 20 mm joint and 15 mm for a 30 mm joint.
This 2:1 joint-width-to-sealant-depth geometry is a starting point for many elastomeric sealants, not a substitute for the technical data sheet or project detail.
The sealant must adhere to the two joint faces, not the back of the joint. Place the rod below the finished surface to control depth and form a bond-breaking boundary that prevents three-sided adhesion. Set its top at the specified sealant depth below the surface.
Check the permitted depth separately for façade joints, concrete slabs, window perimeters, precast-panel joints, and structural movement joints. Traffic loading, weather exposure, substrate movement, and the specified sealant system can impose different minimum, maximum, or non-uniform depths.
- Read the sealant technical data sheet and joint detail before setting the rod.
- If the joint is too shallow for the required sealant cover, use approved bond-breaker tape or redesign the detail; do not force in a large rod.
- Install the rod without stretching or twisting it.
- Press it in with a blunt roller or installation tool, never a screwdriver or blade.
- Replace any punctured, cut, crushed, or stretched section.
Damaged closed-cell foam can create moisture paths and an uneven sealant profile. A loose rod can shift during gunning and allow back adhesion, while excessive compression can reduce movement capacity.
Match the rod and sealant to the joint function
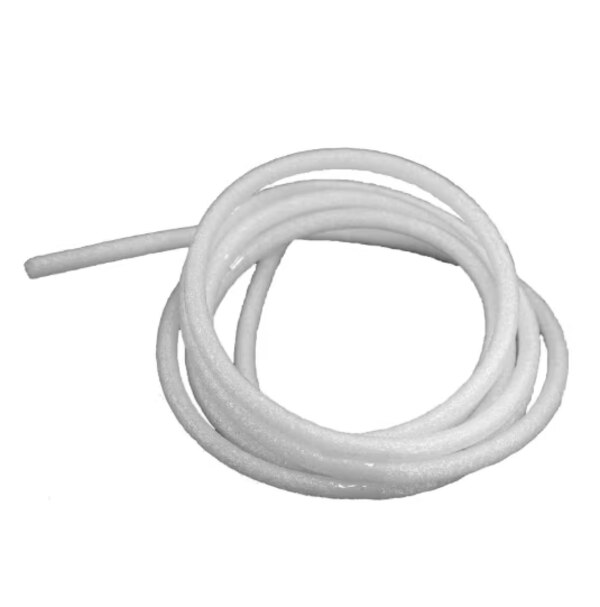
Choose the material by joint function, not by diameter alone. A polyethylene foam rod controls the sealant cavity in a movement joint when the sealant manufacturer accepts that rod material.
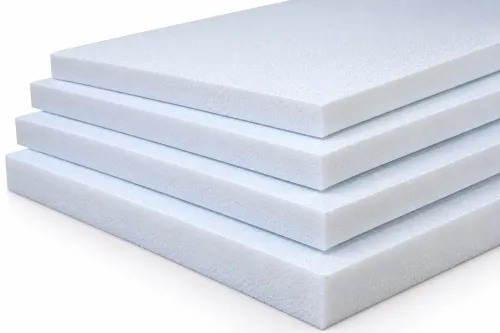
- Use a rigid joint filler board, bitumen-impregnated fibreboard, or cork board when the detail requires a compressible, full-depth filler between concrete elements. A backer rod cannot replace it.
- Use mineral wool only within a tested firestop or acoustic assembly where its density, installation depth, and facing are specified. Ordinary polyethylene foam is not a firestop.
- Use bond-breaker tape when the joint is too shallow for a rod or the detail requires separation behind the sealant. Tape prevents three-sided adhesion; it is not structural filler or a moisture barrier.
Construction joints, compression joints, and movement joints need different project details. A rod diameter cannot substitute for the specified filler board or firestop assembly.
Closed-cell polyethylene is commonly paired with silicone, polyurethane, polysulphide, acrylic, and hybrid sealants, but obtain the sealant manufacturer’s written compatibility statement. Follow its data sheet for primer; the rod does not eliminate priming of concrete, masonry, metal, or window frames.
For fire-rated joints, use a tested system such as mineral wool with rated sealant evaluated to ASTM E1966/UL 2079 or EN 1366-4. The rating belongs to the complete assembly, not the rod alone.
Order by documented performance, not by the words “foam filler rod”
A quotation that says only “foam filler rod” proves nothing about fit or service. Ask a joint filler rod supplier in Delhi for:
- Nominal diameter range and tolerance
- Density, closed-cell or open-cell structure, and water absorption
- Compression and recovery data, temperature limits, and a sealant-compatibility statement
| Evidence | What to verify | Why it matters |
|---|---|---|
| Product data | Diameter tolerance, density, cell structure, absorption | Confirms the rod will compress without absorbing water |
| Compatibility data | Written acceptance for the specified sealant chemistry | Prevents reactions with silicone, polyurethane, polysulphide, acrylic, or hybrid sealants |
| System evidence | Complete tested assembly for fire, façade, wet-area, or acoustic joints | A rod alone does not prove fire, air, water, or acoustic performance |
For fire-rated joints, request assembly evidence to the project standard, such as ASTM E1966, UL 2079, or EN 1366-4. Ordinary polyethylene foam is not a firestop. Shiv Sales Corporation is one Delhi source to compare, but match its documents to the sealant technical data sheet and project specification.
Before quoting, give the supplier the measured joint-width range, installation temperature, sealant brand and chemistry, required sealant depth, and fire or acoustic rating. Inspect each coil for consistent diameter, clean surfaces, intact packaging, and no longitudinal cuts, tears, crushed sections, or stretched areas.
Measure several points, size to the narrowest opening, apply 25–50% oversize, verify compression and depth, then approve the material against the complete joint system. Delhi’s seismic classification and climate influence joint design and sealant selection; neither specifies rod diameter by itself.
Related product
 | Backup Rod – Polyethylene Foam Joint Filler Backup Rod – Polyethylene Foam Joint Filler Backup Rod from Shiv Sales Corporation is a flexible, closed-cell polyethylene foam rod used as a gap filler before applying sealants. View product → |
Frequently asked questions
How do you measure a joint before choosing backup rod size?
Measure the opening at its narrowest usable point with a steel rule, vernier caliper, or joint-width gauge. Check the top, middle, and bottom, then repeat along the façade, slab, window perimeter, or precast-panel run.
What size backer rod should you use for a building joint?
Choose a polyethylene foam backup rod 25–50% larger than the measured joint width. Use the lower oversize range for easy insertion and the higher range when firm retention is needed without damaging the joint edges.
How should backup rod placement affect sealant geometry?
Set the rod below the joint face so the sealant reaches the specified depth and bonds only to the two joint sides. Avoid three-sided adhesion and do not puncture the rod during installation.
How do you compare foam filler rods for different joint functions?
Match the rod and sealant to movement, weather exposure, fire requirements, waterproofing needs, and substrate compatibility. Ask suppliers for density, cell structure, temperature limits, compression recovery, compatibility data, and relevant test documents rather than relying on the phrase foam filler rod.
Keywords